Reproducible build environments for C++ using docker and vscode
“But it compiles on MY machine!” Is one of the phrases that every C++ coder hates. Even with CMake building a C++ app is often hard, because of missing system dependencies, or people have different libraries installed or are just building with another flavor of make or ninja. But thanks to the remote container extension of visual studio code this has gotten much easier.
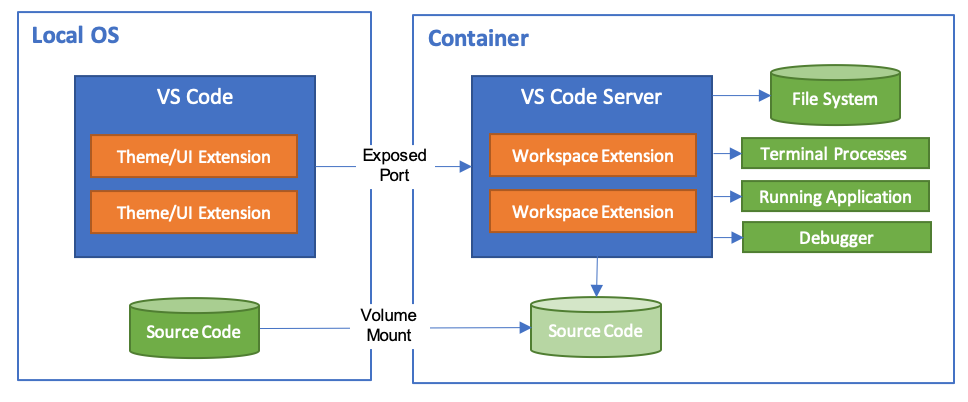
With a single extension installed, vscode supports setting up a complete dev-environment, develop and debug inside a docker container without any fiddling or hack.
A 10000-mile overview
Having the build-environment inside a container is a major game-changer. First, it helps to ensure that all developers have exactly the same dependencies installed, but it goes further. All major CI systems include support for container-based building, the same container that runs on a developer’s machine can be used to build your code on the server. Using dev-containers helps even more because the definition of the container is stored and checked in along with the code in a Dockerfile and the devcontainer.json. By putting it under version control, each commit provides the information about the respective build system set up as well, which is great for consistent builds. So how does this magic work?
Devcontainers in a nutshell
What you need besides vscode is a docker1 container containing all your requirements and a devcontainer.json file describing how to use your container. In the following example, I will set up a customized container for creating and debugging a C++-application. For extra convenience, I will include some developer tools and vscode extensions into the container as well. Once set up, vscode will connect to the container, install all specified extensions and run a server to accept its commands. After that, all operations will be done in the running container. If you need help seeting up docker or visual studio code I would kindly refer you to the official documentation.
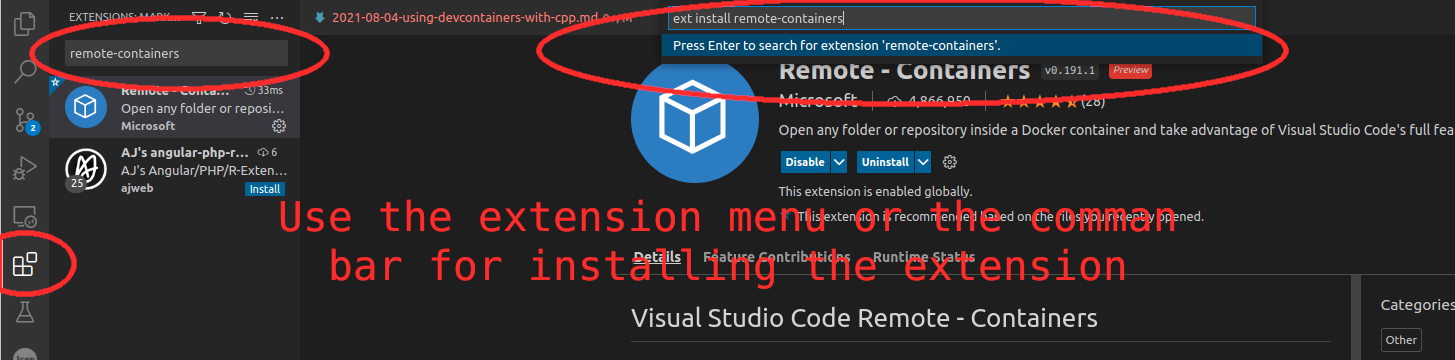
The remote-container extension needed for running devcontainers can be installed by pressing CTRL+P and then typing ext install remote-containers in the command bar.
Project structure
The devcontainer configuration is stored in a devcontainer.json file either in a folder named .devcontainer or named .devcontainer.json in the root of your project. I prefer the folder approach, because it is a bit easier to work with Dockerfiles and because it lets me keep all the needed files together.
├── CMakeLists.txt
├── .devcontainer
│   ├── devcontainer.json
│   └── Dockerfile (Optional)
└── src
    └── main.cpp
Defining the container
Let’s start with a simple Dockerfile that uses a predefined container and applies some customization. Additionally to what is provided I install a few more packages, notably gdb for debugging the application easily inside the container and some tools like curl, vim, and the bash-completion to make working in the console easier. Since the container from conan comes with a predefined user conan I briefly switch to root for installing and afterward switch back to conan. Adding this customization is not strictly necessary, but it makes working inside the container easier.
FROM conanio/clang10:1.39.0

# switch to root
USER root

# install a few tools for more convenient developing
RUN  apt-get update; \
    apt-get -y install --fix-missing \
    gdb curl bash-completion vim

USER conan

#install git shell extension
RUN curl -L https://raw.github.com/git/git/master/contrib/completion/git-prompt.sh > ~/.bash_git && echo "source ~/.bash_git" >> ~/.bashrc
RUN sed -Ei 's/(PS1=.*)(\\\[\\033\[00m\\\]\\\$.*)/\1\\[\\033[01;33m\\]$(__git_ps1)\2/p' ~/.bashrc
For even more convenience I then add the git-ps1 to get the current branch name as part of the console stub. I use this frequently, but there are of course many more customization that can be done.

Telling vscode to use the container
Now that the docker image to be used is defined, let’s tell vscode how to use it. For this, we place a devcontainer.json file and place it in the folder .devcontainer.
{
    "build": {
        "dockerfile": "Dockerfile"
    },
    "extensions": [
        "ms-vscode.cpptools",
        "ms-vscode.cmake-tools",
        "vadimcn.vscode-lldb",
        "cheshirekow.cmake-format"
    ],

}
First, we tell vscode that it needs to build the container itself and then we pass the relative path to the Dockerfile to it. Afterward there is the extension block, that tells vscode which extension to install inside the container once it is built. For a C++ project, I consider the following the minimum set of extensions to install.
ms-vscode.cpptools: The C++ language support for vscodems-vscode.cmake-tools: cmake support for vscodevadimcn.vscode-lldb: lldb debugger support for easy debugging by pressing F5cheshirekow.cmake-format: cmake-format is not strictly necessary, but nobody wants to read ugly code
And that is all that is needed to be ready to get going.
Using a container from a container registry
Defining the docker image locally over a Dockerfile allows for customization, but the container has to be built locally each time it changes. Depending on the complexity of the image this might be tedious, so an alternative is to pull the image from an image repository such as dockerhub. In that case, instead of adding a build information to the devcontainer.json we can directly specify the image to use.
In the example below I’m pulling an existing image that includes Qt and gcc9 ready to be used.
{
    "image": "bbvch/conan_qt-5.15.2_builder_gcc9",
    "extensions": [
        "ms-vscode.cpptools",
        "ms-vscode.cmake-tools",
        "vadimcn.vscode-lldb",
        "cheshirekow.cmake-format"
    ],

}
Starting the container
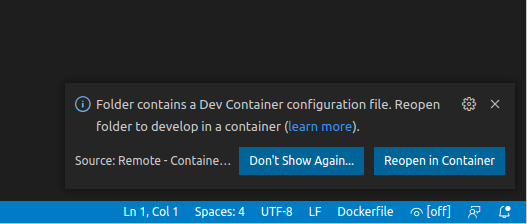
Once the devcontainer is set up and the image is built (or downloaded) we’re ready to go. You can either actively switch to the container by pressing CTRL+P and selecting “Rebuild and Reopen in Container” command.

Or just restart vscode in which case you will be asked if you want to switch to the devcontainer.
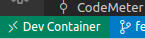
In the lower left corner a green sign appears that tells you whenever you’re working in a devcontainer. Clicking on it will bring up the command palette for dev containers.
Your devcontainer is up and running and you can start to work without worrying about diverging build environments. If your devcontainer works as expected I recommend to use the same container in your CI as well, for even more consistency when building C++ apps. And that’s it for setting it up - Happy coding!
-
Other container runtimes such as podman will also work, but I am not familiar with them ↩